
Intro: Stretch decides whether a knit pattern will fit. Sewing Project Manager lets you record how much each fabric stretches and how much each pattern needs, and then warns you when they do not match.
1. Test the fabric
Cut a piece of fabric and mark a 4 inch length along the direction you want to test. Pull it to a comfortable stretch and measure how long it gets. The stretch percentage is how much longer it became, compared with the 4 inches you started with. A piece that stretches from 4 inches to 6 inches has stretched 50 percent.
2. Use the Stretch Test Gauge
The fabric form has a Stretch Test Gauge (4-inch pull test). Slide it to the length your 4-inch mark stretched to, and the gauge works out the percentage. You can also enter an optional recovery check, the length of the mark after you let go. Select Use as Horizontal Stretch or Use as Vertical Stretch to copy the number into the field.
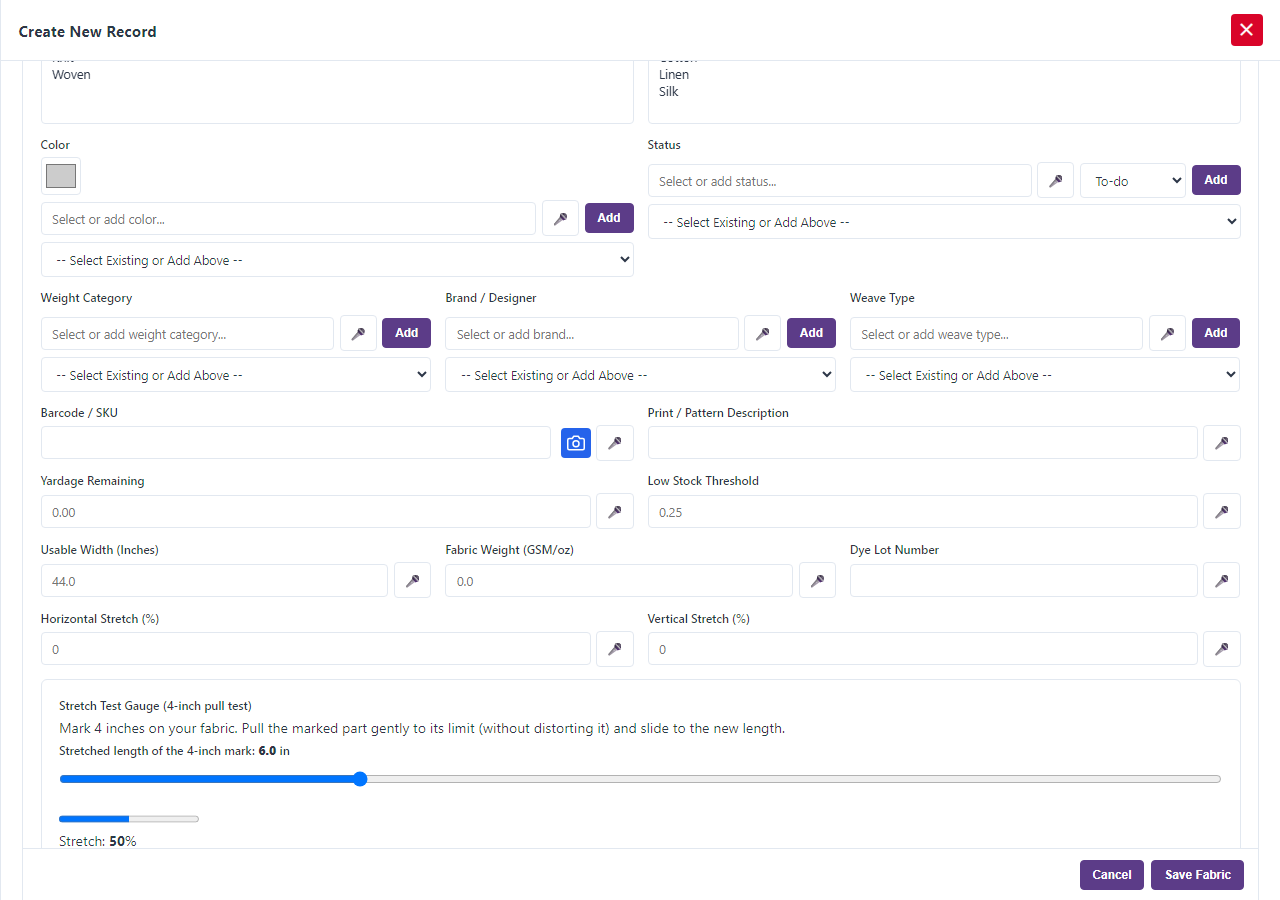
3. Record it on the fabric
Open the fabric in Textile Library. Enter the Horizontal Stretch (%) and the Vertical Stretch (%). Horizontal is across the width of the fabric and vertical is along its length. Save the fabric.
4. Record what the pattern needs
Open the pattern in Pattern Vault and enter the Required Stretch (%). This number is usually printed on the pattern envelope.
5. Let the app compare them
When you link a fabric to a pattern, the app compares the two. If the fabric stretches less than the pattern requires in both directions, you will see a Stretch Advisory with the numbers. You are allowed to continue, so it is a warning and not a block.
6. Use it when you shop
Because stretch is recorded on the fabric, you can look through your stash before you buy to see whether you already own a fabric that stretches enough.
One more thing: Sewing Project Manager at Frozen Arctic Apps stores the stretch of every fabric and checks it against your pattern before you cut.